Once logged into the control panel, scroll down to ‘Domains’.

Select the ‘Zone Editor’ option.

Next to the domain you wish to setup, select ‘Manage’

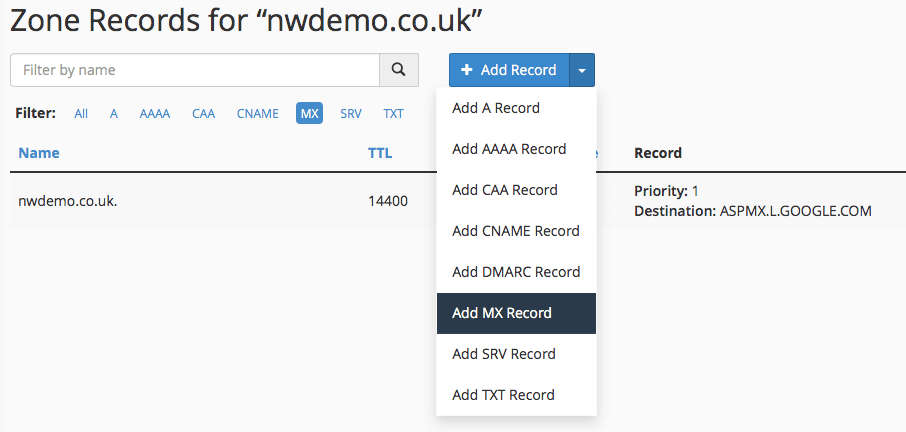
From the filter menu select ‘MX’ then click ‘Edit’

Alter the Priority to ‘1’ and the Destination to ‘ASPMX.L.GOOGLE.COM’ then click ‘Save Record’
Click the arrow next to ‘+ Record’ and select ‘Add MX Record’

Set the Priority as ‘5’ and the Destination as ‘ALT1.ASPMX.L.GOOGLE.COM’ and click ‘Save Record’

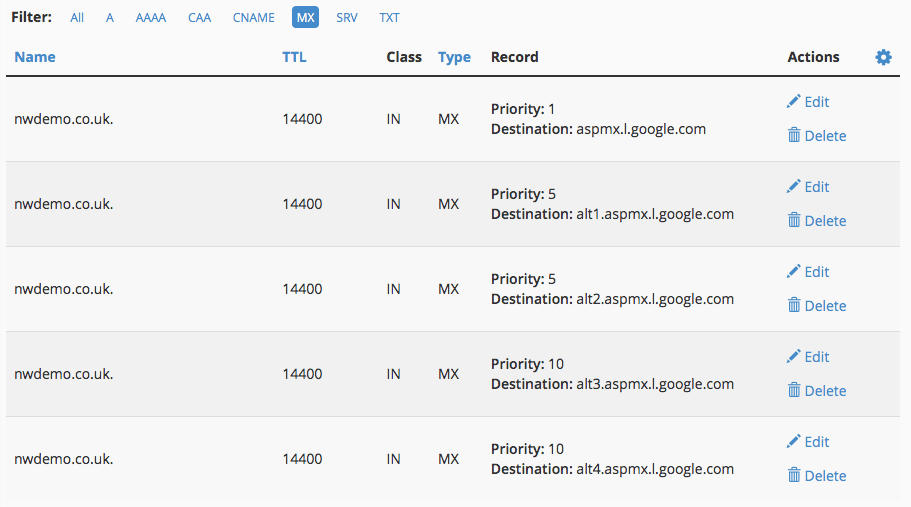
Repeat this process with the following records:
| The system successfully delivered the message. | |
| The message encountered a delivery error. | |
| The message's status is unknown, or delivery is in progress. | |
| The system deferred the message. | |
| The system archived the message. | |
| The system rejected and discarded the message at SMTP time. This typically occurs because the sender's server does not use a secure configuration or appears on a Real-time Blackhole List (RBL). | |
| The mail server accepted the message but did not deliver the message to the recipient's inbox. This typically occurs because spam software filtered the message. |
Your MX entries should then look like this:

E-mail will now immediately start to flow to your G Suite account and you’ll be able to complete your setup there.
