Greylisting defends email users against spam. When you enable Greylisting, the mail server will temporarily reject any email from a sender that the server does not recognise. If the email is legitimate, the server that sent it will try to send the email again after a delay. After a sufficient amount of time, the server will accept the email.
Greylisting is enabled by default, but you can disable it via your control panel.
First, login to your control panel, then click the ‘Configure Greylisting’ icon.
You’ll then be presented with a list of domains on your account, allowing you to enable or disable greylisting for them.

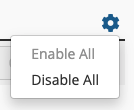
You can also bulk enable/disable by clicking the cog icon.