How to Setup a HTML message in an Autoresponder
This guide will explain how to setup your autoresponder to contain HTML code. In order to do this you must first know how to setup an autoresponder – if you are unaware of how to do this see our guide here.
Step 1. Navigate to the ‘Autoresponders’ page
This can be found in the control panel under the ‘Email’ heading as ‘Autoresponders’.
Step 2. Fill in the Required Fields
Using your preferred information, set your ‘Character Set’, ‘Interval’, ‘Email’, ‘Domain’, ‘From’ and ‘Subject’ to your preferences. If you are unaware of what information to use here, please see Step 2 in our guide on How to Setup an Autoresponder.
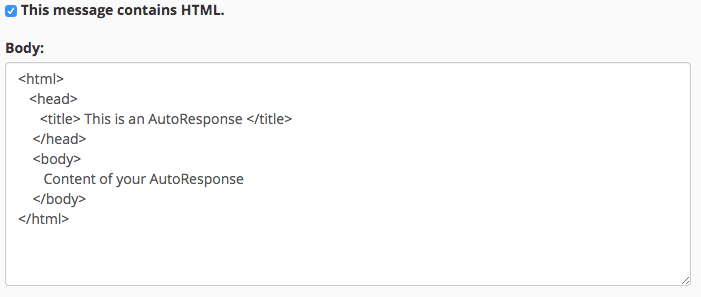
Step 3. Select ‘This message contains HTML’
In order for the body of your message to contain HTML you must select the ‘ This message contains HTML box’.
Step 4. Writing your HTML
You can now write your HTML code successfully in the ‘Body:’ field and your message will appear as you write it. After you have done this click ‘Create/Modify’.
Once you have written your HTML, we recommend you test your code with a practice Email just to make sure your HTML contains no bugs. You can do this by sending an email to the account with the autoresponder and awaiting a reply.