How to Manage your Email Disk Usage
Sometimes Email Accounts can quickly fill up their given disk space and require managing. This guide will show you how you manage all your email account quotas.
Once these steps have been carried out, the deleted emails cannot be recovered, we advise you warn account users to check and save any important emails they may wish to keep before carrying out these steps!
Step 1. Where Do I Manage My Email Disk Usage?
First go to the control panel – Which can be found through logging in on the NetWeaver site.
Once you are on the control panel, in the search tool at the top of the page search ’email’. 
From here select ‘Email Accounts’. Scroll down so you can see the heading ‘Email Accounts’ – below should be a list of email accounts on your account.

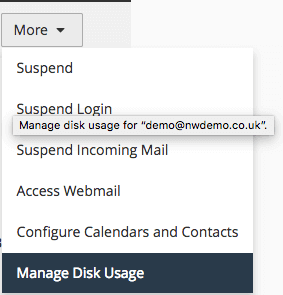
For the account you would like to manage select ‘More’ on the far right hand side of the menu and press ‘Manage Disk Usage’.


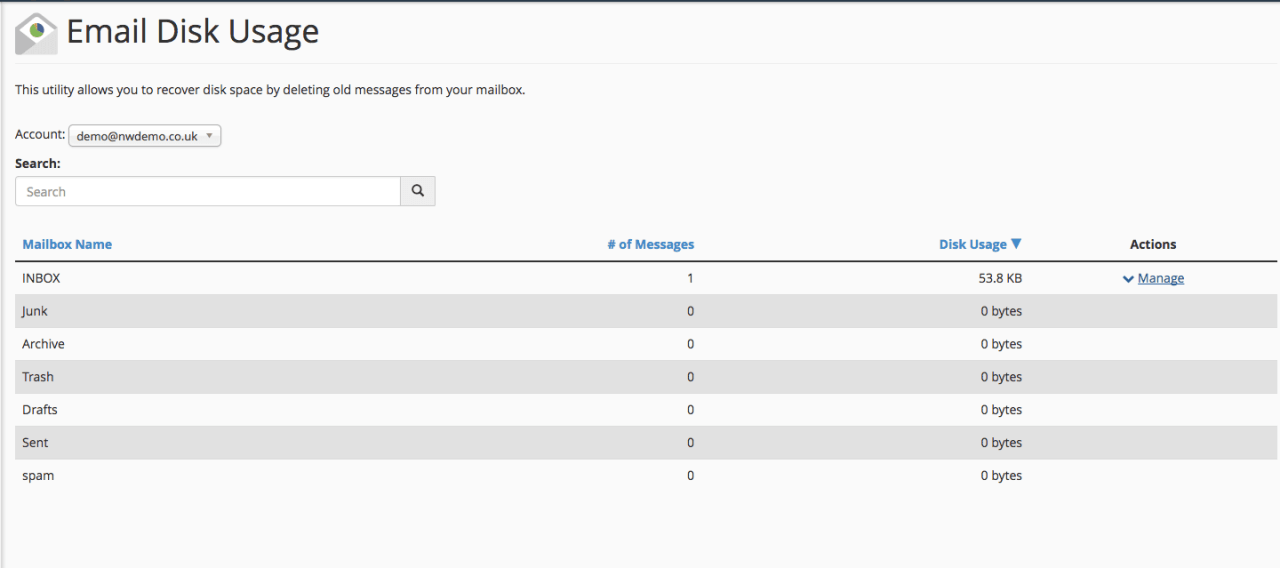
This page then gives you a simple breakdown of that specific account and how much disk usage is being taken up in each folder.
Step 2. Deleting Emails
In order to clear up disk space in your specified account you must delete some emails.
We recommend you start by clearing emails from the ‘Trash’ as the user has already identified that they do not wish to keep these.
For the mailbox you would like to clear, select ‘Manage’.

This gives you the choice of emails you can delete from the account. By selecting ‘1 year old or more’ any emails older than 1 year will be deleted. If you wish to create a custom query range, please see the Custom Email Query guide.
Select the option you require and then press the ‘Delete Permanently’ button.
You have now deleted the emails from this account in this mailbox.
If you are still having trouble with the amount of disk space, we recommend doing the same for other mailboxes and also narrowing the time range of the emails you would like to delete.
