How to Setup an Email Forwarder
This guide will explain how to setup a forwarder for any of your email accounts. This is useful if you have multiple email addresses which you would like emails to be redirected to.
Step 1. Navigate to the Control Panel and Select ‘Forwarders’
From the control panel, scroll down to the ‘EMAIL’ heading and select ‘Forwarders’. If you are struggling see our guide on How to access the Control Panel.
Step 2. Setting up the Forwarder

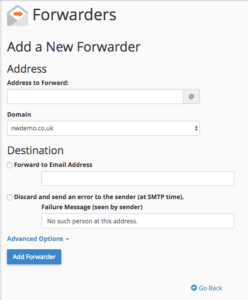
From here you should set up your forwarder how you would like it.
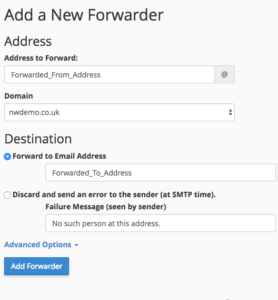
The address you wish the emails to be forwarded from should go in the ‘Address to Forward’ field.
If you wish for the email to be forwarded to a specific address, you select the ‘Forward to Email Address’ box and then input your address in the following field.

Subsequently, with this setup, emails received at the ‘Forwarded_From_Address’ should be automatically sent from this inbox directly to the ‘Forwarded_To_Address’ once the ‘Add Forwarder’ button has been pressed.
If you were to select the ‘Discard and send an error to the sender (at SMTP time).’ will send an error message to the sender of the email.
Advanced Options
In advanced options you can select three other destinations. ‘Forward to a system account’, ‘Pipe to a Program’ and ‘Discard (Not Reccommended’
We recommend to not use the ‘Forward to a system account’ option, this will simply send it to the account setup when your NetWeaver account was made.
If you wish to redirect any emails to a specific address to a specific program use the ‘Pipe to a Program’ option. This is good if you want your emails to be redirected to a ticketing software rather than a mail account.
If you wanted the emails to be discarded you could select ‘Discard (Not Recommended)’, although we do not recommend this option purely because the email sent to the ‘Forwarded_From_Address’ will not be received by anyone and immediately permanently deleted.
